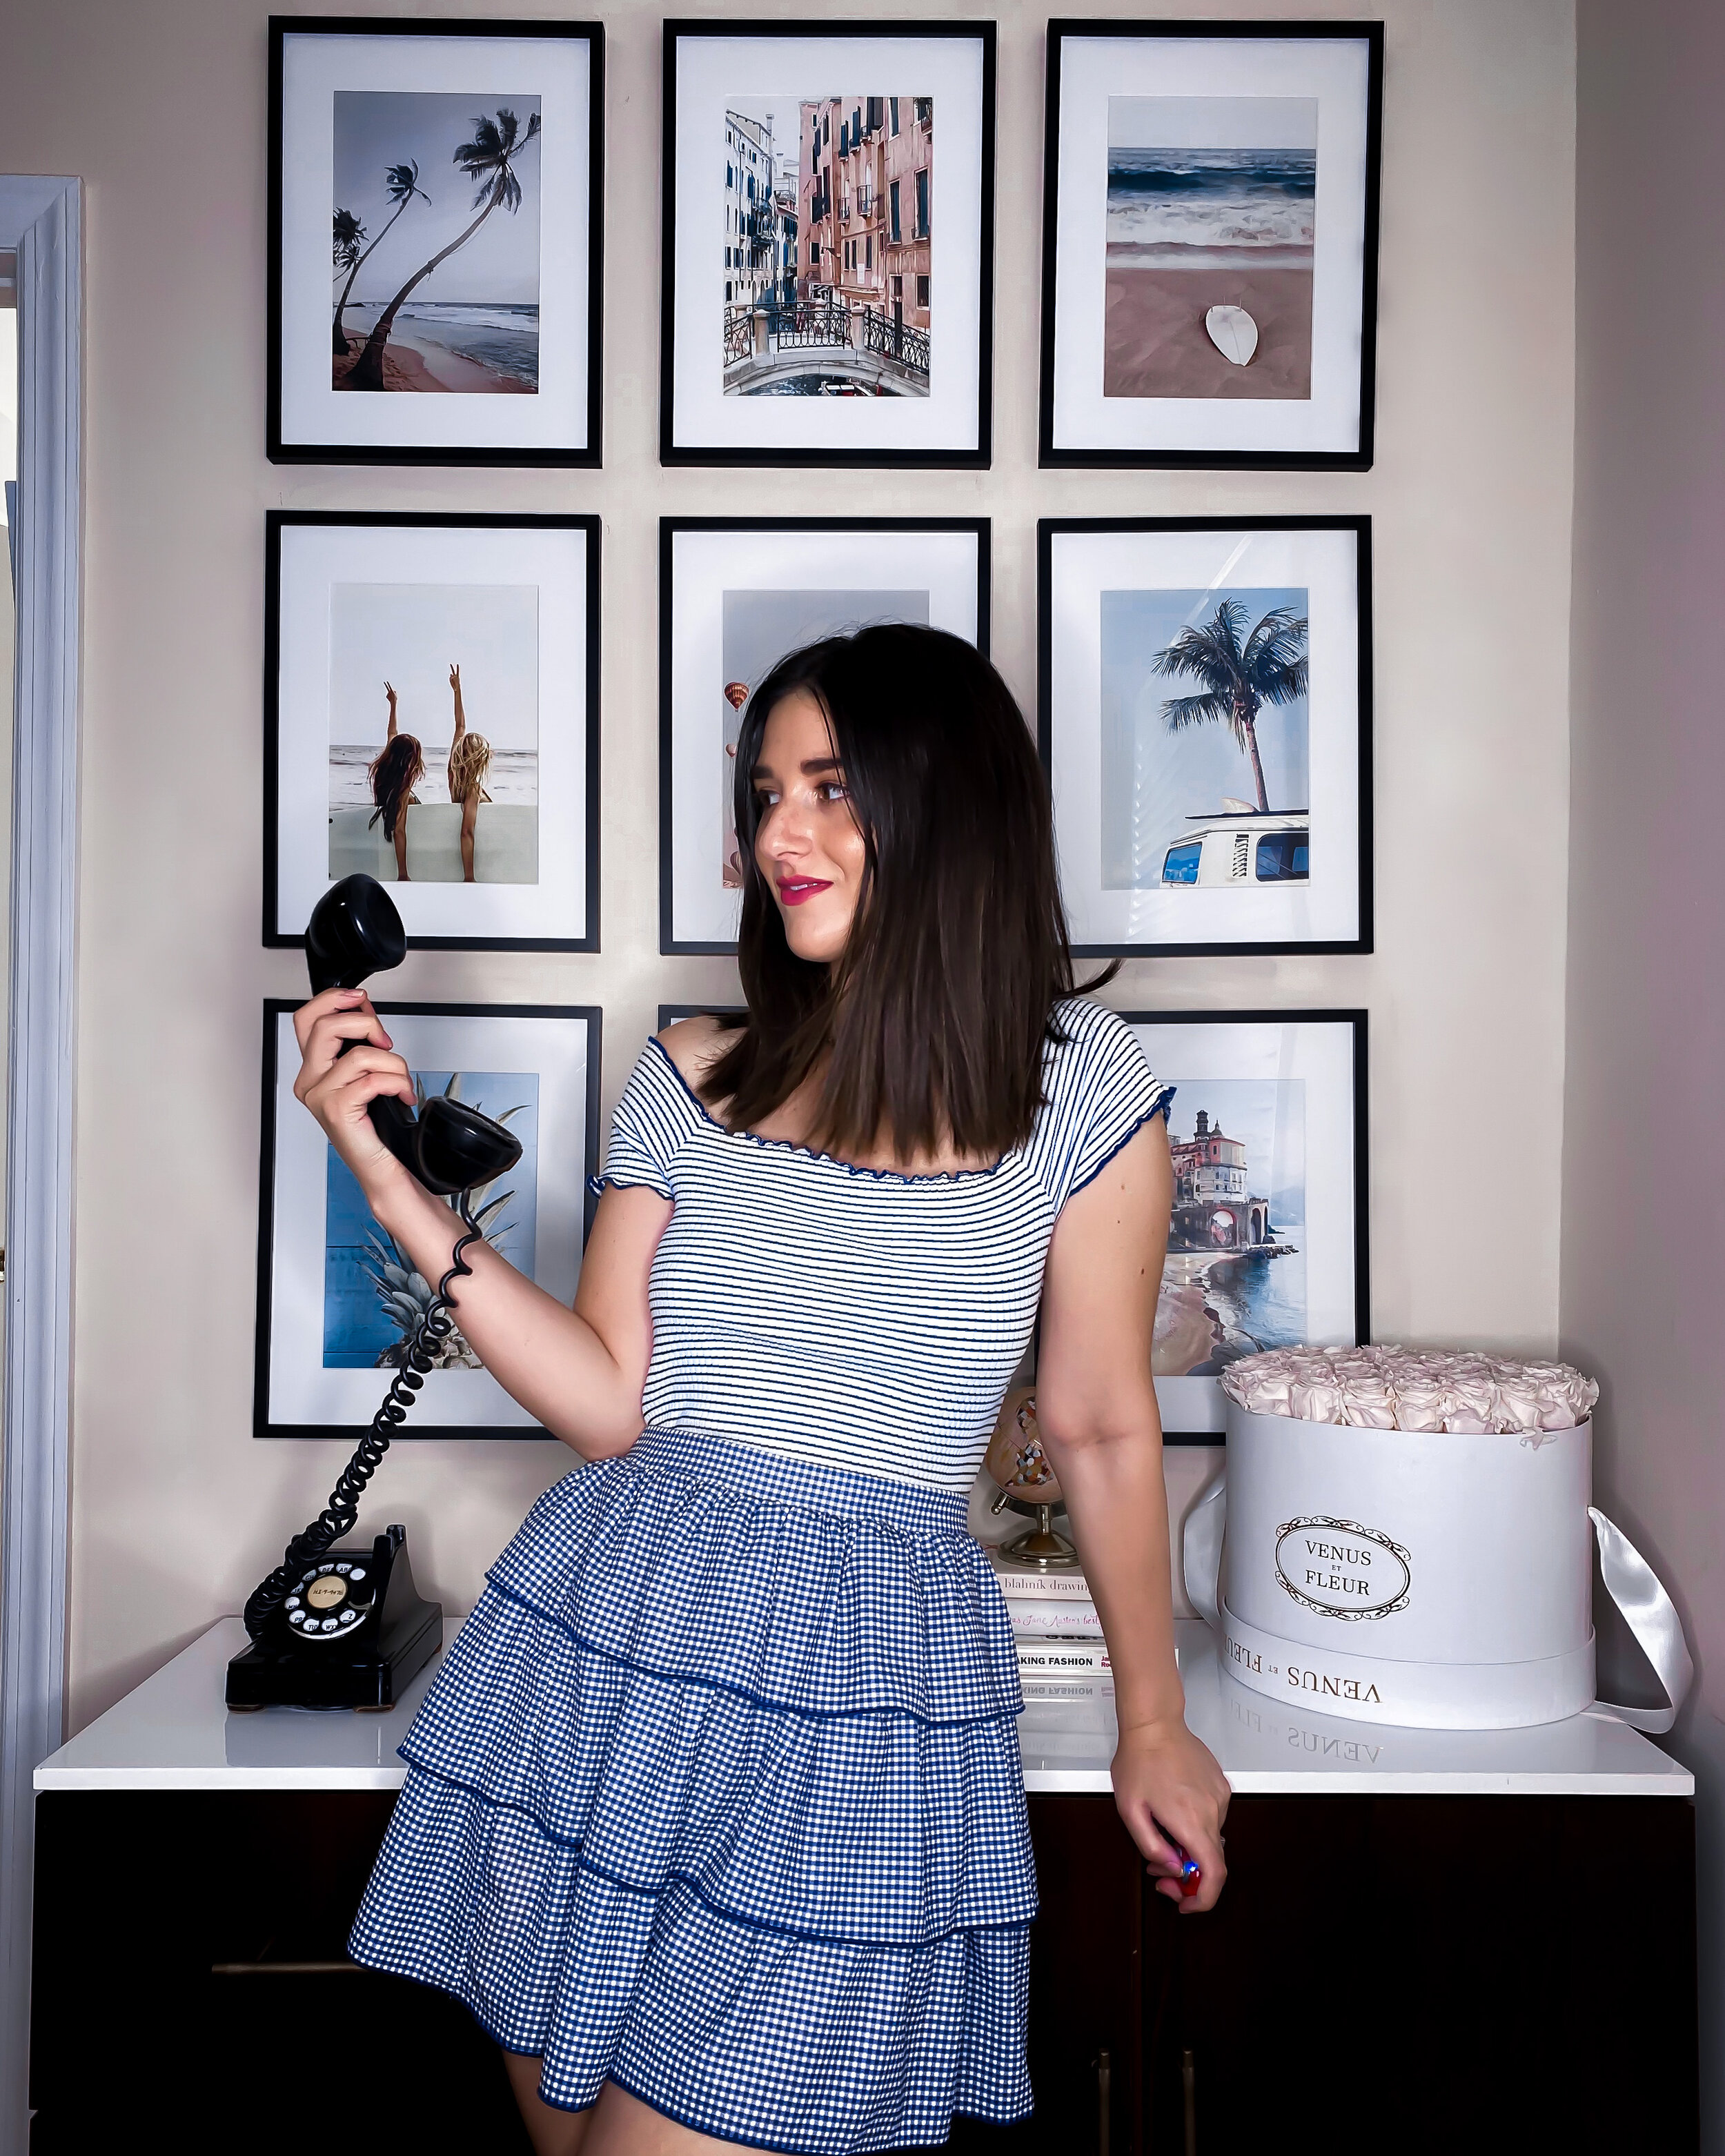
Creating A Grid Gallery Wall // Poster Store
Gallery walls used to intimidate me. I always admired them, but before creating my own, I would stress about choosing the perfect prints, hanging them evenly, and getting the placement right. It wasn’t until after I got married that I sucked up my fear and decided it was time to put art on our walls.
I started small and chose four fashion prints to hang symmetrically above my desk. My measuring was a little off, so it took a few tries to nail them in correctly, but the result was more than worth the effort. From then on, I was hooked (no pun intended) and gallery walls no longer seemed so daunting. I now look at them as a simple way to make a huge statement, so I partnered with Poster Store to bring my newest vision to life.
How To Choose Prints:
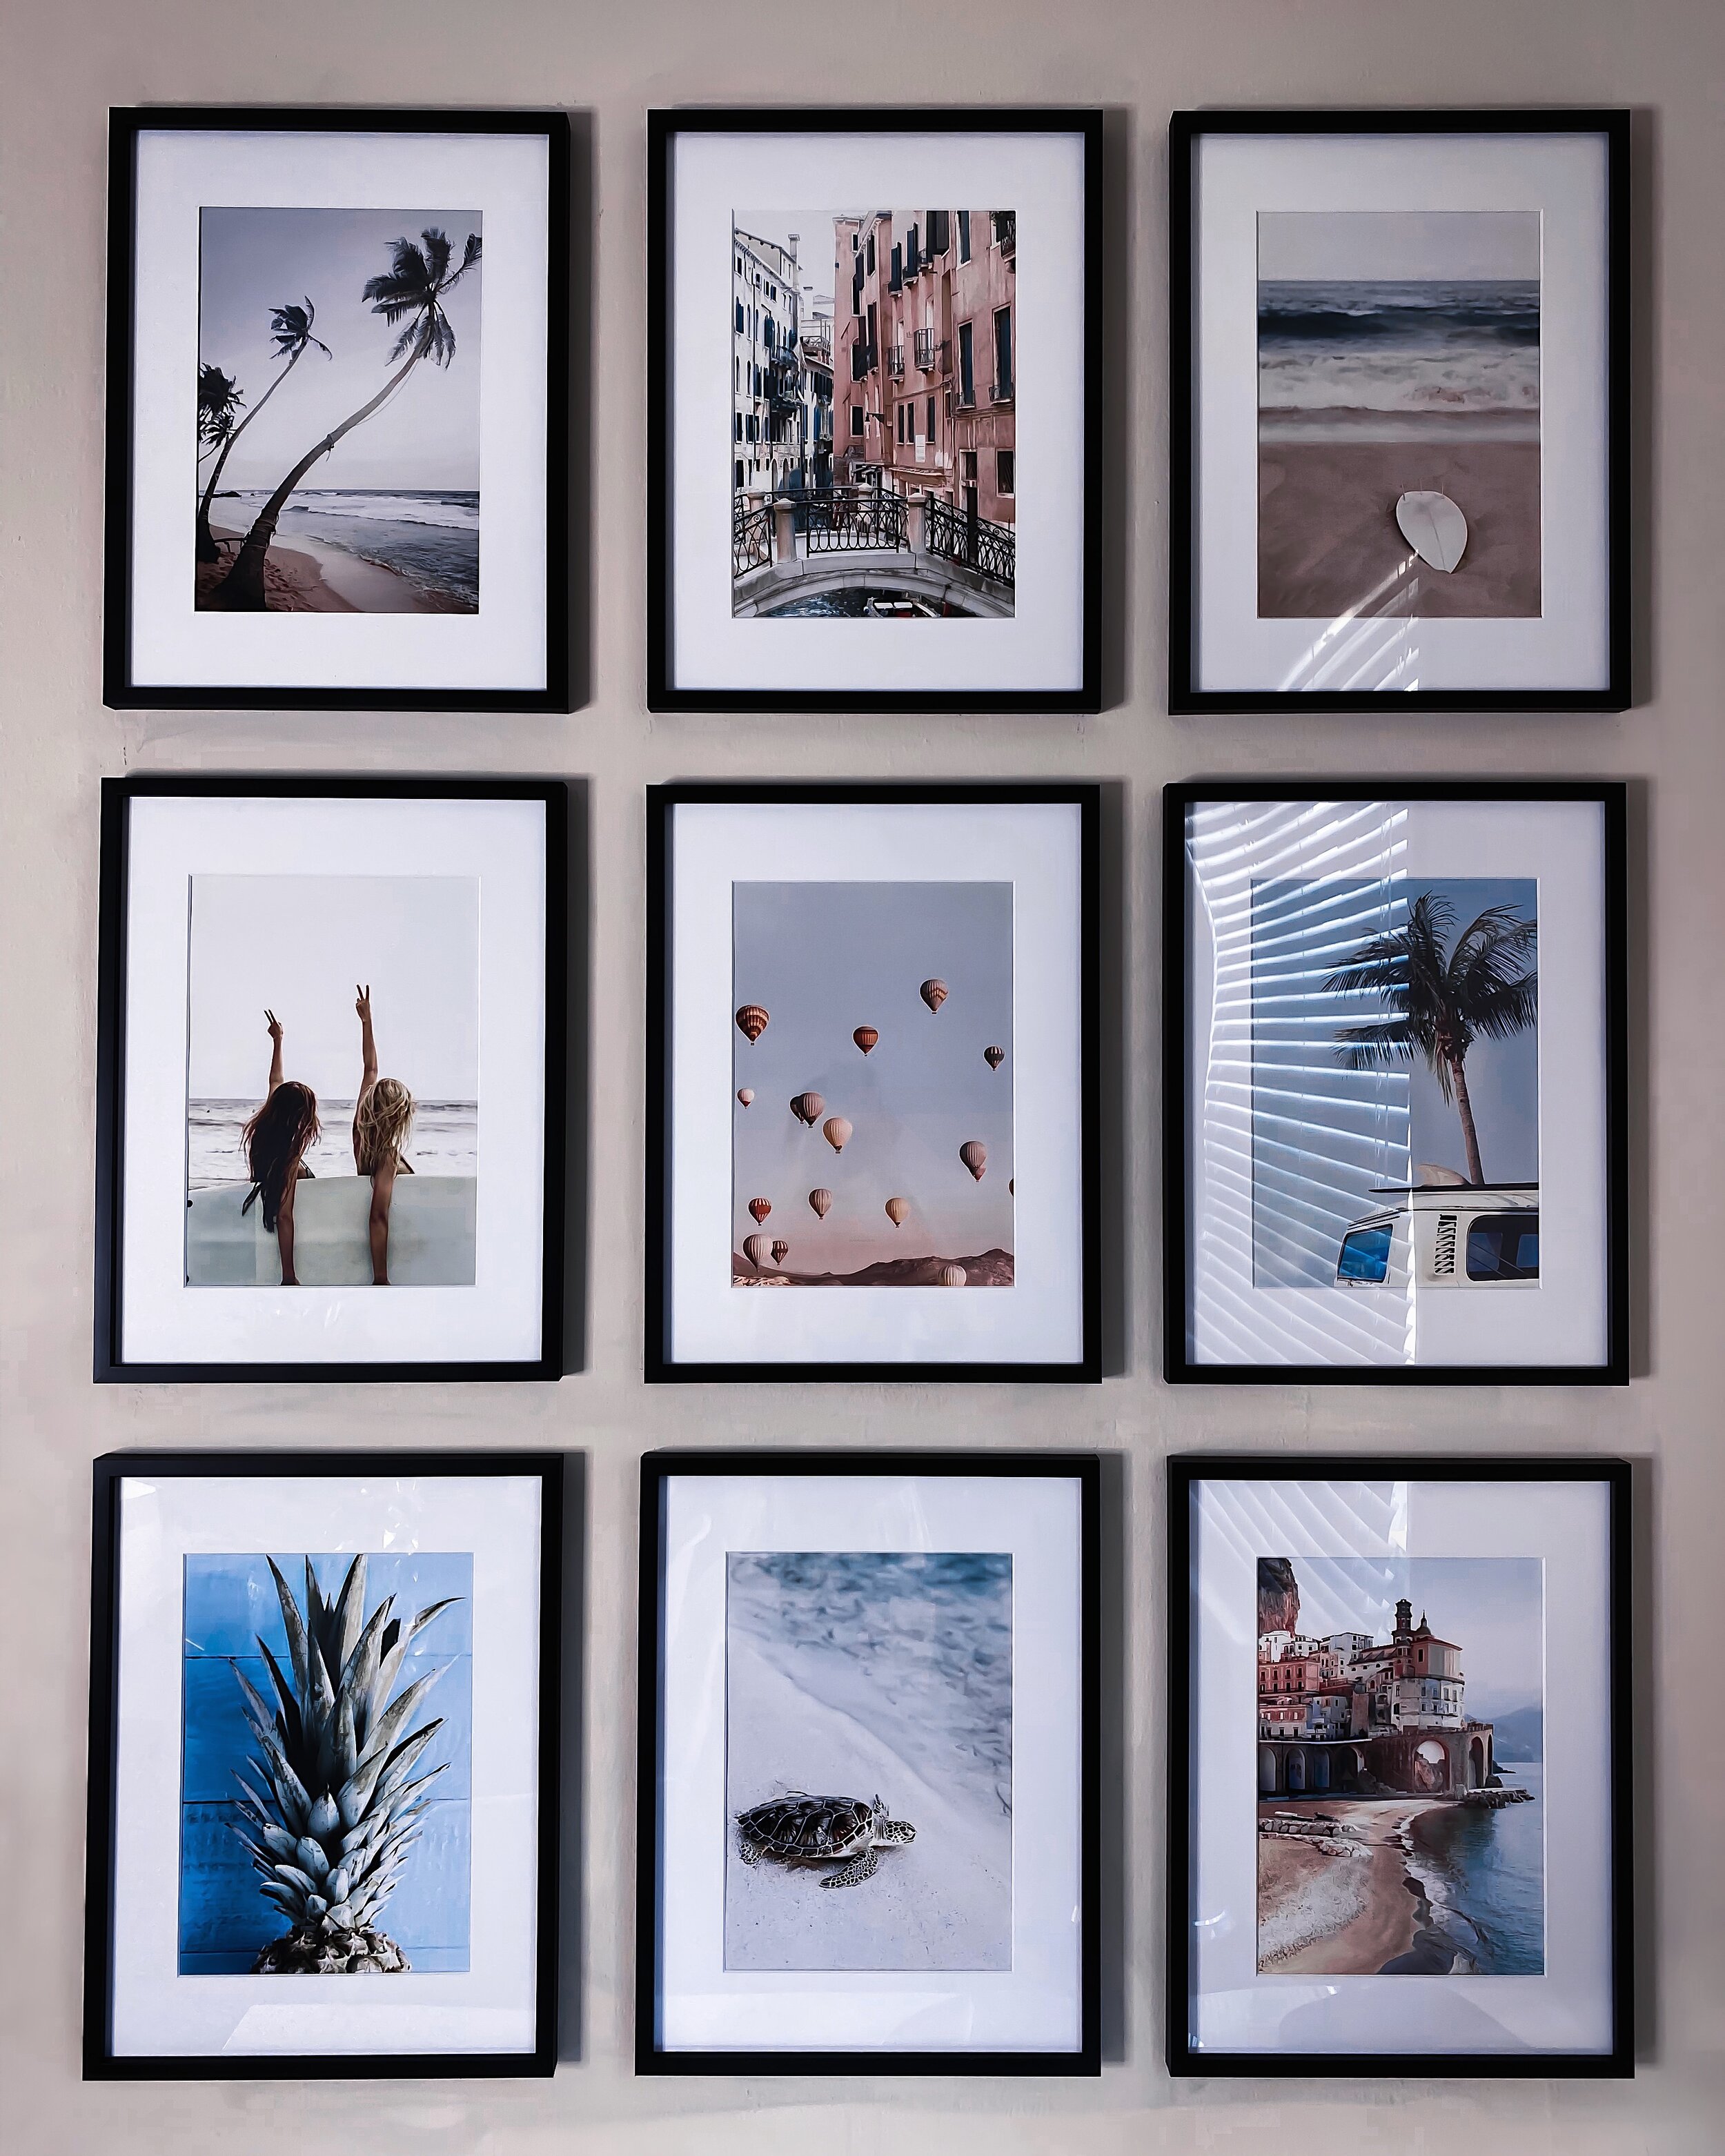
After I found an image of the gallery wall I wanted to recreate, I started scrolling through Poster Store’s site to figure out a theme. I knew I needed nine prints and my initial instinct was to choose all black and white images, but then I saw the most beautiful travel shots. Poster Store arranges their selection by color, so I actually happened upon the blue toned group of travel shots I wound up choosing all at once. Seeing them together like that took out the hard part of finding cohesive prints and helped me instantly visualize my new gallery wall.
I combed through the rest of the site, screenshotting every print that could potentially work with my blue travel theme, and added the images to a Powerpoint slide. I then played around with the images, arranging and eliminating them until I was left with a perfect 3x3 combination. I’m a very visual person, so mocking everything up first is my number one tip when creating a gallery wall.
How To Figure Out Placement:
My husband always helps me here, but I measure the wall space I’m working with to find the center. Once I find the center, I use a pencil to draw where the frames will go, always leaving 2” between each print, on all sides. Based on everything I’ve read, I stick to these two rules: Place prints 6-8” above furniture and keep prints 2” apart.
It’s a bit time consuming, but sometimes I like to use masking tape to map out exactly where to hang the frames. It makes it easy to see if I should change anything.
How To Hang Prints:
If the frames are small, I highly recommend using Command Strips to avoid making holes in the wall, but for frames bigger than 8x10, I prefer using hooks.
I find it best to start by hanging the bottom center frame first since if you accidentally make a mistake at the top, your gallery wall may get too close to the furniture below. Use a leveler as you hang to keep the frames straight.
Make sure to pay attention and measure where the hook is on the back of each frame so you can figure out exactly where to hammer in the nails to get the right height. Don’t worry about penciling the wall. You can use a Magic Sponge to clear it all up after.
Here are links to the prints, frames, and borders I used, all in the size 11.8" x 15.7":
Black Metal Frame 11.8" x 15.7"
Passe-partout 11.8" x 15.7" White
Use the code esthersanter30 for 35% off all posters through August 27th (excluding selection posters and frames). This code is not valid with other discounts.
Feel free to get in touch with any questions.
xx Esther


